Tag Archives: Level Design

Up Against

upagainst_overview

Quick two-player duel map, “Up Against”, for Command & Conquer 3 Kane’s Wrath.  Download available from ModDB.

Took about three days to make. It’s very fun for me to learn new tools of game making, including historical ones, so I do these little one-offs sometimes. Last time it was Torchlight, I believe, but I got bored with that before I could finish the map. Kane’s Wrath still has a player base, so perhaps this ends up in a map pack or something. That would be cool.

Got any suggestions as to what else I should try?


Level designer popcorn

Rejoice, children of Nod! Small excursion into level design for an RTS game, in this case Command and Conquer 3: Tiberium Wars / Kane’s Wrath. An old game by now, but still has a few tricks up its sleeve such as the rather gorgeous volumetric light ray effect that lends the game world a feeling of depth and mystery. Stock maps often go for a greenish fog to portray the game’s creeping Tiberium infestation, but I chose a blood red hue which I think goes well with the desert textures.

Here’s without post processing. See the difference. My eyes! It just blends a lot better on the high settings, doesn’t it.

I’m just practicing detailing, checking out the wealth of assets and having some fun. I’ll file it under art practice. *cough* The game is well worth checking out, the level editor “Worldbuilder” is freely available. Nice textures, fully 3D, realtime lighting and post processing options, what’s not to like? Makes for an excellent toy.


Herd Base Timelapse

Want to see an animated time-lapse of SJ’s Herd Base level growing from tender beginnings to an engine-eating monster?

There are over 80 images from various phases of the project, the earliest still containing Quake textures and monsters, the latest showing my experiments with shadowmaps and dynamic lighting in the FTE engine as well as increasing use of custom assets.

Click here for the goodness.

Browser support:

Sorry for the possible inconvenience, but I chose animated PNG format over Youtube for image quality reasons. The plugin takes only a couple clicks to install and you probably want it anyway.


Nu-Moat

catacombs_mill_bridge

The centerpiece of the third level solidified enough to commit to a layout. I’ve been wanting to do this earlier, but changes in the storyline / in the main questline kept popping up so it was pretty hard to visualize the whole thing.

This used to be the moat area of RMQ e1m3rq. Suffice to say, it changed a lot. There are now two faction camps and a boss fight in there. Various cutscenes are also set in this area.

I’ll probably be able to reuse some of the dungeon areas from the RMQ map, but the centerpiece just wasn’t good enough, similar to the outside area from the second level.

I won’t be able to block this in with BSP brushes, so I guess it’ll be done completely in Blender. I did use BSP for the Temple area when I made that, but brushes have reached the end of their usefulness here.


Moar helis

herdbase_heliroom

The first level of Scout’s Journey has had a helicopter fetish all the way back when it was still an RMQ map. This might be due to Supa’s idea to have a KA-50 like helicopter and gnounc making a model of it. What the heck, let’s indulge our helicopter fetish some more with this idea for a dual heli hangar, loosely inspired by the rebel base from The EmpIre Strikes Back. I think this is going to be awesome.

I really try not to allow feature creep in SJ any more, but in this case the idea seems cool and the game already has a heli model and the rest is just going to be standard props that can be reused. The area itself is just a few more concrete walls – the base has a ton of that stuff already, the theme is long established, so it’s like a drop in the ocean. So yeah, I think I’ll do this.

This’ll be a nice place to put some banshees, or potentially a Preacher, and let the player choose to attack or to sneak past. Equally nice option to hide a few items and all that. The first level doesn’t have many confrontations yet, so this is a plus. It’ll also tie the back end of the level together nicely.

I briefly thought to put this area near the end of the game, but I figure it’s best to impress the player early on.

Feels good to do some level design again. It should be fun making this.

Edit; another thing this reminds me of is the Lab X18 from STALKER, which is good.


Better tablet support in Blender

blender275

Blender 2.75 RC2 contains a bugfix that allows for fly mode with a graphics tablet. Fly mode is especially neat for environment artists because it lets you traverse large models quickly and precisely, much like “noclipping” in an engine.

Previously, the view would spin uncontrollably.

I’m slowly getting into working in Blender with a tablet instead of a mouse – I use a Wacom for all my PC work now – and after some initial finding my feet, it works very nicely.

I’m convinced that a tablet is a much more ergonomic input device compared to a mouse, my wrist feels a lot better since I started doing this anyway.

You can get this version of Blender here.


It will rub the lotion…

herdbase_modular_substitute

Managed to put in some time today despite still being sick with anemia. Working in 50 minute blocks.

Still going through this level and painstakingly putting in modular elements where the brushwork used to be. Pink is former BSP, white is my new pieces. (Pic taken in Blender.)

Not terribly entertaining, it’s rather work of the “has to be done” sort. It’ll be pretty once it’s all done and in Unreal. Painful but worth it.

I’ll be able to do most of this level in the same fashion. With the next one, I’m going to use a better conversion process that doesn’t generate any triangle mess in the first place. This part is also by far the most modular one of the Herdbase sections. The other two use a lot of simple concrete slabs, which won’t need so much redoing. The final Herdbase part uses largely terrain, which is gonna be fun. After that, the temple dungeons are largely modular AND they already use a lot of meshes. That’s gonna be a lot less painful.

OK, three work units done now. Let’s make it a routine again. There’s always hope.


Friends in Unlikely Places

map2obj_q4

Found a better way to transfer .map to .obj after reading the tip somewhere on quake3world.com. Instead of q3map2 one loads the map into Q4Radiant (of all things) and then simply select everything and export selected as .obj.

map2obj_q3map2

This is the q3map2 version – as we saw before, it looks like a shattered mirror. The geometry of the version exported from Quake 4 (upper image) is very clean, and a single “tris to quads” in Blender gives you a workable mesh.

This will save me a huge amount of time.

In theory, this also means that you can easily map in Radiant and export to Unity. You just need Quake 4.

Currently still looking at engines, not decided yet. It can be done in both Unity and UE4 though, I’m sure.


funky walls

modularset_herdbase_0614

Did a bit more modeling recently.

^ Modular wall set for herdbase level. Cycles render. This goes back all the way to the Remake Quake project. Naturally it looks better now, is a lot easier to use, and made the transition from BSP brushes to modular meshes.

Progress, eh.


Terrain collision

terrain_collision

Terrain models collide quite happily now. Meaning you can walk around on them as you’d expect. This isn’t the heightmap terrain, but a mesh made in Blender.

For some reason, q3map2 seems to treat terrain meshes as planar surfaces/triangle fans instead of triangle soup, so adding the meshcollide surfaceparm to the terrain shader directly did nothing. Only when I added a dedicated collision mesh with the meshcollide shader on it did things work. I don’t presently know why that happens.

collisionmesh

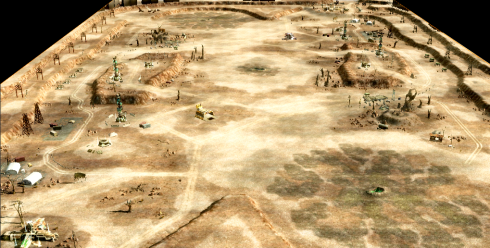
In this image from Blender, white is the collision mesh.

The terrain has about 5000 tris, which I find acceptable for something this size, and the collision mesh was decimated to about 1200 tris. So the entire terrain has the polycount of 2 or 3 character models. That’s pretty efficient.

Heightmaps are somewhat limited in a number of ways. On the upside, they’re easy to make. On the downside, they must be made separately from the rest of the environment so there is guesswork involved, and they can’t be as detailed. You also can’t have vertical terrain or caves with a heightmap.

I’ll have to figure out a way to blend textures on terrain meshes still, otherwise I might go with a megatexture-like approach. We’ll see. I can probably use vertex colours to vary the brightness of the surface.

In other news, I’m still writing SJ’s quest system, and I started using a different method to create visportals in my maps. I found that severely reducing the number of visportals / leaves brought a large gain in performance, especially in very large and detailed levels. The reduction of the vis data is done by disabling blocksize (which keeps the compiler from automatically chopping the map into blocks, aka leaves) and instead operating more with hint portals, antiportals and areaportals. The polycount of a scene rarely seems to matter anymore. What matters more is batching. I got the idea to use larger vis leaves from looking at Call of Duty (and Doom 3) with their visportals / cell based occlusion.

Call of Duty also gave me a number of other ideas, regarding for example AI navigation and scripting. It must be one of the most impressive idtech-based games (I’m talking CoD 1 and 2 here.)